Traditional WordPress architecture was once the standard for web development. However, as business needs grow more complex and more platforms and devices are used to reach content, there is a need for new technology.
Headless WordPress was developed to satisfy these business needs.
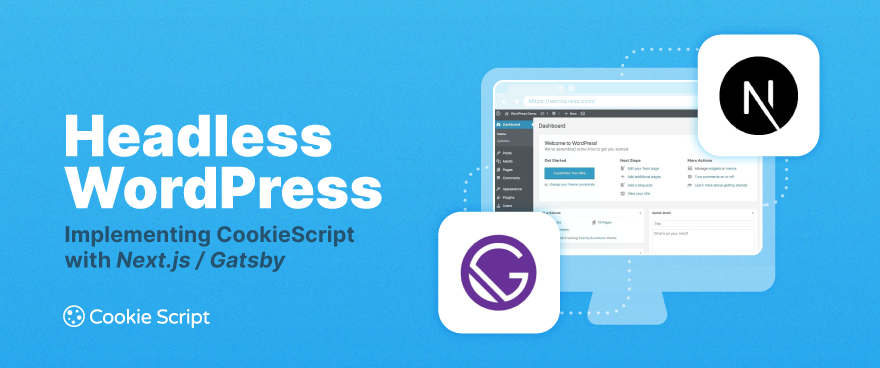
This article explains headless WordPress, shows how to implement CookieScript with Next.js or Gatsby, how to manage Cookie Consent, and how to reach compliance with data privacy laws.
What Is Headless WordPress
Traditional WordPress controls both the content and its display. In traditional WordPress, it handles everything: content, renders pages (PHP themes), and loads scripts and plugins directly.
Headless WordPress was developed to separate websites’ content from design and functions. Headless WordPress only handles the content of the site. Other technologies like Next.js or Gatsby are used to manage websites’ design and functions. Thus, Headless WordPress separates sites’ look, functionality, consent management, and compliance issues from content.
Headless WordPress decouples the frontend from the backend.
In other words, headless WordPress means that the head (front-end) is removed from WordPress. You use some other technology for the front-end (Next.js, Gatsby, React, Vue, etc.), while WordPress is used to deliver content.
Headless WordPress is called headless because it removes the head, or presentation layer (theme, templates, layout). Only the body remains, that is used for content management (WordPress admin, database, plugins).
Headless WordPress becomes a content API rather that a website renderer.
Headless WordPress setups are popular among developers because they offer:
- Better performance (static generation / SSR).
- Easier scaling.
- More flexible UX.
- Multichannel publishing (web, mobile, apps).
Using CookieScript across headless frontend frameworks like Next.js or Gatsby ensures compliance with GDPR and other privacy laws. CookieScript ensures compliance, while the headless WordPress manages content, separating compliance from content and allowing content to fit many digital platforms and software.
In 2024, users ranked CookieScript CMP on G2, a peer-reviewed website, as the best CMP for small and medium-sized companies. It’s also a Google-certified CMP.
Headless WordPress: Implementing CookieScript with Next.js
In a Headless WordPress setup, the Next.js frontend handles user interaction, while WordPress manages content. Consequently, you should implement the CookieScript banner in your Next.js application, where the cookies are actually being set.
Note: the CookieScript Cookie Banner script must be placed in the Next.js layout to ensure it persists across page transitions.
Read this step-by-step guide on how to implement CookieScript with Next.js.
1. Add the CookieScript banner to Next.js
Place the script in your app/layout.tsx. Use the next/script component with the afterInteractive strategy to maintain high Core Web Vitals (LCP/INP) scores.
// app/layout.tsx
import Script from "next/script";

export default function RootLayout({ children }: { children: React.ReactNode }) {
 return (
  <script
 id="cookiescript"
 src="https://cdn.Cookie-Script.com/s/.js"
 strategy="beforeInteractive"
 />
  {children}
  );
}
Note: CookieScript should load early, before any third-party scripts or embed snippets you want to block.
2. Block analytics / marketing scripts until a user gives consent
Headless WordPress often pastes YouTube URLs or X (Twitter) embeds into the Gutenberg editor. WordPress then sends this HTML to Next.js via the REST API or GraphQL.
This is the major challenge, since if you render content via dangerouslySetInnerHTML, third-party scripts analytics or marketing might fire before the user interacts with the Cookie Banner.
The 2026 solution to solve this issue is to use CookieScript's Automatic Script Blocking. CookieScript supports blocking by changing script tags so they don’t execute until the user accepts.
The basic pattern to block analytics / marketing scripts until consent could be performed by:
type="text/plain"data-cookiescript="accepted"optionally data-cookiecategory="statistics" / "marketing" etc.
Example: Use this script to block Google Analytics (gtag.js) until Statistics consent:
<!-- GA loader blocked -->
 <script
   type="text/plain"
   data-cookiescript="accepted"
   data-cookiecategory="statistics"
   data-src="https://www.googletagmanager.com/gtag/js?id=G-XXXXXXX"
 ></script>

 <!-- GA init blocked -->
 <script
   type="text/plain"
   data-cookiescript="accepted"
   data-cookiecategory="statistics"
 >
   window.dataLayer = window.dataLayer || [];
   function gtag(){dataLayer.push(arguments);}
   gtag('js', new Date());
   gtag('config', 'G-XXXXXXX');
 </script>
Note: For external scripts, CookieScript uses data-src instead of src. In Next.js, you can render those tags in app/layout.tsx, a Analytics.tsx component, or wherever you’d normally inject analytics, just keep them after the CookieScript snippet.
3. Configure CookieScript settings
Configure CookieScript for Global Privacy Control (GPC), AI disclosure, Google Consent Mode v2, and zero-latency.
- Enable GPC in the CookieScript dashboard. Go to your CookieScript user account > Settings > Frameworks, where you will find GLOBAL PRIVACY CONTROL (GPC), and toggle it to ON. With GPC enabled, CookieScript will detect if a user has GPC active in their browser and automatically opt out of sharing or selling user data.
- Enable Google Consent Mode v2 in your CookieScript settings and make sure your GTM container is loaded after CookieScript in Next.js.
- For AI disclosure, add an ACF Boolean field
is_ai_generatedto posts in WordPress, and fetch the field and render a "Generated by AI" badge in Next.js. - For zero-latency, use
strategy="afterInteractive" in Next.js to prevent render-blocking.
4. Test cookie blocking, GPC, and Consent Mode v2
In 2026, regulators are strictly auditing if your site respects cookie blocking, Global Privacy Control (GPC), and Consent Mode v2.
- To test cookie blocking, load your app in a fresh incognito window and check for cookie behavior. Make sure that all cookies except essential ones are blocked until users give consent.
- To test GPC, open your site in a GPC-enabled browser (e.g. Brave). Open the console and check if the banner automatically displays an "opt-out signal detected" message.
- To test Consent Mode v2, use the
window.CookieScript.instance.currentState()method in your Next.js code and check consent status before firing custom client-side events.
CookieScript CMP could be used to create a unique cookie banner and obtain and store Cookie Consent. It has the following features:
- Integrations with CMS platforms like WordPress, Shopify, Joomla, etc.
- Cookie banner customization
- Google Consent Mode v2 integration
- IAB TCF v2.2 integration
- Google Tag Manager integration
- Certification by Google
- CookieScript API
- Cookie Scanner
- Consent recordings
- Third-party cookie blocking
- Geo-targeting
- Local storage and session storage scanning
CookieScript is a Google-certified CMP, recommended by Google, for the implementation of Google Consent Mode v2 and Google Tag Manager. It is included in the list of Google-certified CMPs.
Common CookieScript implementation mistakes in Next.js
These are the most common Next.js gotchas and their possible solutions:
1. You loaded GA/GTM before CookieScript
If GA/GTM appears in the HTML (or gets injected) before CookieScript, the browser starts fetching it immediately and often executes it before CookieScript initializes. CookieScript can’t block what already executed.
To fix the issue, load CookieScript globally and as early as possible.
import Script from "next/script";

export default function RootLayout({ children }: { children: React.ReactNode }) {
 return (


 <script
 id="cookiescript"
 src="https://cdn.Cookie-Script.com/s/.js"
 strategy="beforeInteractive"
 />

 {children}

 );
}
2. You used next/script with afterInteractive for analytics but CookieScript loads later
afterInteractive means that the script should be run as soon as React has hydrated and the page is interactive.
If CookieScript is:
- loaded in a component that renders later,
- injected by a layout below other scripts,
- or loaded with a later strategy,
then GA/GTM executes first.
To fix the issue, use the consent-first model: use CookieScript beforeInteractive, and block analytics via CookieScript attributes.
3. You forgot to switch src to data-src for blocked external scripts
CookieScript’s blocking method works by preventing the browser from treating it as an executable script, and only activating it after consent.
That’s why you must:
- change
srctodata-src; and - Add
type="text/plain"so the browser doesn’t execute it; and - Use d
ata-cookiescript="accepted"(and category if used).
To fix the issue, put these after CookieScript (layout/head), but they won’t execute until consent:
{/* External GA library - blocked */}
<script
 type="text/plain"
 data-cookiescript="accepted"
 data-cookiecategory="statistics"
 data-src="https://www.googletagmanager.com/gtag/js?id=G-XXXXXXX"
/>

{/* GA init - blocked */}
<script
 type="text/plain"
 data-cookiescript="accepted"
 data-cookiecategory="statistics"
 dangerouslySetInnerHTML={{
 __html: `
 window.dataLayer = window.dataLayer || [];
 function gtag(){dataLayer.push(arguments);}
 gtag('js', new Date());
 gtag('config', 'G-XXXXXXX');
 `,
 }}
/>
type="text/plain" matters because the browser won’t execute it as JS. CookieScript will later rewrite it when consent is granted.
Headless WordPress: Implementing CookieScript with Gatsby
In a Headless WordPress setup, the Gatsby frontend handles user interaction, while WordPress manages content. Thus, you should implement the CookieScript banner in your Gatsby application.
Note: the CookieScript Cookie Banner script must be placed in Gatsby to ensure it persists across page transitions.
Read this step-by-step guide on how to implement CookieScript with Gatsby.
1. Add the CookieScript banner to Gatsby.
Create gatsby-ssr.js in your project root:
// src/components/ConsentScripts.js
import React from "react";

export default function ConsentScripts() {
 return (
 <>
 {/* External script: use data-src instead of src */}
 <script
 type="text/plain"
 data-cookiescript="accepted"
 data-cookiecategory="statistics"
 data-src="https://www.googletagmanager.com/gtag/js?id=G-XXXXXXX"
 />

{/* Inline init: type text/plain so it doesn't execute pre-consent */}
 <script
 type="text/plain"
 data-cookiescript="accepted"
 data-cookiecategory="statistics"
 dangerouslySetInnerHTML={{
 __html: `
 window.dataLayer = window.dataLayer || [];
 function gtag(){dataLayer.push(arguments);}
 gtag('js', new Date());
 gtag('config', 'G-XXXXXXX');
 `,
 }}
 />

 );
}
Note: Use Gatsby’s SSR API to inject global <head> scripts for all pages.
2. Block analytics / marketing scripts until a user gives consent
Headless WordPress often pastes YouTube URLs or X (Twitter) embeds into the Gutenberg editor. This is the major challenge, since if you render content via dangerouslySetInnerHTML, third-party scripts analytics or marketing might fire before the user interacts with the Cookie Banner.
You can solve this issue by using CookieScript's Automatic Script Blocking. CookieScript supports blocking by changing script tags so they don’t execute until the user accepts.
The basic pattern to block analytics / marketing scripts until consent could be performed by:
type="text/plain"data-cookiescript="accepted"optionally data-cookiecategory="statistics" / "marketing" etc.
Example: Use this script to block Google Analytics (gtag.js) until Statistics consent:
// src/components/ConsentScripts.js
import React from "react";

export default function ConsentScripts() {
 return (
 <>
 {/* External script: use data-src instead of src */}
 <script
 type="text/plain"
 data-cookiescript="accepted"
 data-cookiecategory="statistics"
 data-src="https://www.googletagmanager.com/gtag/js?id=G-XXXXXXX"
 />

{/* Inline init: type text/plain so it doesn't execute pre-consent */}
 <script
 type="text/plain"
 data-cookiescript="accepted"
 data-cookiecategory="statistics"
 dangerouslySetInnerHTML={{
 __html: `
 window.dataLayer = window.dataLayer || [];
 function gtag(){dataLayer.push(arguments);}
 gtag('js', new Date());
 gtag('config', 'G-XXXXXXX');
 `,
 }}
 />

 );
The “text/plain + data-cookiescript + (optional) category + data-src” combination prevents Analytics execution before consent.
Note: For external scripts, CookieScript uses data-src instead of src. In Gatsby, you can render those tags in app/layout.tsx, a Analytics.tsx component, or wherever you’d normally inject analytics, just keep them after the CookieScript snippet.
3. Configure CookieScript settings
Configure CookieScript for Global Privacy Control (GPC), AI disclosure, Google Consent Mode v2, and zero-latency.
- Enable GPC in the CookieScript dashboard. Go to your CookieScript user account > Settings > Frameworks, where you will find GLOBAL PRIVACY CONTROL (GPC), and toggle it to ON. With GPC enabled, CookieScript will detect if a user has GPC active in their browser and automatically opt out of sharing or selling user data.
- Enable Google Consent Mode v2 in your CookieScript settings and make sure your GTM container is loaded after CookieScript in Next.js.
- For AI disclosure, add an ACF Boolean field
is_ai_generatedto posts in WordPress, and fetch the field and render a "Generated by AI" badge in Gatsby. - For zero-latency, Use
strategy="afterInteractive" in Gatsby to prevent render-blocking.
4. Test cookie blocking, GPC, and Consent Mode v2
In 2026, regulators are strictly auditing if your site respects cookie blocking, Global Privacy Control (GPC), and Consent Mode v2.
- To test cookie blocking, load your app in a fresh incognito window and check for cookie behavior. Make sure that all cookies except essential ones are blocked until users give consent.
- To test GPC, open your site in a GPC-enabled browser (e.g. Brave). Open the console and check if the banner automatically displays an "opt-out signal detected" message.
- To test Consent Mode v2, use the
window.CookieScript.instance.currentState()method in your Gatsby code and check consent status before firing custom client-side events.
Most Common CookieScript Implementation Mistakes in Gatsby
Here are the most common CookieScript implementation mistakes in Gatsby using headless WordPress:
1. CookieScript loads too late, thus, tracking or marketing cookies fires before consent.
This happens because you inject CookieScript via react-helmet, a layout component, or Gatsby <Script> defaults, which often run after hydration or end up late in <head>.
To fix the issue, load CookieScript globally via gatsby-ssr.js using SSR APIs, so it’s present in the initial HTML.
Make sure CookieScript is added before any scripts you want to block (analytics, pixels, embeds).
2. You forgot the CookieScript blocking attributes, so nothing is blocked.
In this case, banner is shown, but cookies still get set.
This happens because you left scripts as normal <script src="/…"> and expected CookieScript will automatically block them.
To fix the issue, make these changes:
- For external scripts/iframes: switch
srcintodata-src - Add
data-cookiescript="accepted" - Add
data-cookiecategory="statistics"/"marketing"etc. (If using categories).
3. Inline scripts still execute because you didn’t change the type
In this case, your “init” snippet runs even though the external file is blocked.
It happens because the external script uses data-src, but the inline init stays as a normal JS script tag.
To fix the problem, use these snippets:
type="text/plain"data-cookiescript="accepted"- (optional)
data-cookiecategory="…"
4. You used Gatsby <Script> for blocked scripts, so the timing backfires
In this case, scripts behave inconsistently: sometimes they are blocked, sometimes not.
It happens because Gatsby’s <Script> loads after hydration by default, which can mess with “consent-first” ordering if you’re not careful.
How to fo fix the problem:
- Use SSR injection (
gatsby-ssr.js) for CookieScript itself. - For scripts that must be blocked, keep them as raw tags with CookieScript attributes. This will prevent execution until consent.
5. Route changes don’t trigger tracking properly (SPA issue)
This will lead to the following problems:
- Analytics only tracks the first page load, or tracks weirdly; or
- You see duplicate pageviews/events.
It happens because Gatsby is a SPA after the first load. Your analytics logic needs onRouteUpdate, and it needs guardrails to avoid duplication.
How to fix it:
- Track pageviews on route changes using onRouteUpdate in gatsby-browser.js.
- Add checks so you don’t inject/initialize scripts multiple times.
6. Banner works only after refresh
This is the classic Gatsby third-party script trap. A banner (scripts) work only when you hard refresh a page, not when navigating internally.
It happens because you’re relying on the page load behavior in a client-side routed app.
To fix the issue, put global stuff in gatsby-ssr.js (initial HTML) and/or handle route transitions with gatsby-browser.js hooks.
Frequently Asked Questions
Do I need a WordPress plugin to use CookieScript in a headless setup?
No. Headless WordPress only manages content; it doesn’t render the frontend. WordPress plugins cannot automatically inject scripts into your Next.js or Gatsby app. You must install CookieScript directly in your frontend code, for example, in layout.tsx, _document.tsx, or gatsby-ssr.js.
Where should I place the CookieScript code in Next.js?
Load CookieScript globally and before any tracking scripts. Best locations include Next.js app router: app/layout.tsx using next/script with strategy="beforeInteractive" and Next.js pages router: pages/_document.tsx or pages/_app.tsx. This ensures CookieScript initializes before analytics, pixels, or embeds, and blocks all third-party scripts.
Where should I place CookieScript in Gatsby?
Use gatsby-ssr.js to inject CookieScript into the <head> of every page. This ensures it loads during server-side rendering and can block scripts before the browser executes them. Avoid relying only on layout components or react-helmet, since those may load too late.
Why aren’t my analytics scripts being blocked?
The most common reasons: CookieScript loads after your analytics scripts; you use src instead of data-src; inline scripts still use type="text/javascript" instead of text/plain; and scripts were injected dynamically without CookieScript attributes. CookieScript can only block scripts that are properly marked and loaded after it initializes.
Does CookieScript work with static site generation (SSG)?
Yes. CookieScript works with static builds (Gatsby, Next.js SSG), server-side rendering (SSR), and hybrid rendering. Since CookieScript runs in the browser, it doesn’t depend on how the page was generated.
How do I handle scripts coming from WordPress content (YouTube, embeds)?
Headless WordPress often delivers raw embed HTML via REST API or GraphQL. These embeds may contain <iframe src="/..."> elements that set cookies immediately. To prevent Third-Party Cookies loading before consent, you need to either replace src with data-src, transform embeds before rendering, or use consent-aware embed components in your frontend.
Can I use CookieScript with Google Tag Manager in a headless frontend?
Yes, and it’s often the easiest approach. You can block the GTM container until consent, then let GTM control individual tags based on consent categories. Just make sure the GTM container itself is blocked using CookieScript attributes.